Thinking about how to build your own kitchen cabinets? You’re not alone.
Many homeowners want to save money and create something truly customized for their space. But where do you start? Building cabinets might seem overwhelming, but with the right guidance, tools, and a clear plan, you can turn your kitchen dreams into reality.
You’ll discover simple steps to build sturdy, beautiful cabinets that fit your style and needs. Ready to take control of your kitchen makeover and save money? Keep reading — your perfect cabinets are closer than you think.
Planning Your Cabinets
Start by measuring your kitchen space carefully. Measure the height, width, and depth where cabinets will go. Write down all numbers clearly. Double-check to avoid mistakes. Accurate measurements help cabinets fit well.
Next, think about the style of cabinets you want. Choose from modern, traditional, or shaker styles. Pick a style that matches your kitchen and personal taste. Simple designs are easier to build for beginners.
Choosing the right materials and tools is important. Use good quality wood like plywood or MDF for strength. Gather tools like saws, drills, screws, and clamps. Having the right tools makes building easier and safer.
Cutting Cabinet Components
Start by cutting the carcass panels to size using a table saw. Precision is key for strong cabinets. Measure twice, cut once. Use plywood or MDF for durability. Smooth edges with sandpaper to avoid splinters.
Prepare shelves and dividers by cutting them to the right width. Shelves should fit snugly inside the carcass. Dividers help organize cabinet space. Use a straight edge and clamp to keep cuts clean and straight.
Shape faceframes from hardwood strips. These frames add strength and style. Cut stiles and rails to fit the cabinet front. Use a miter saw for accurate 90-degree cuts. Join pieces with wood glue and clamps. Sand smooth before attaching to the carcass.
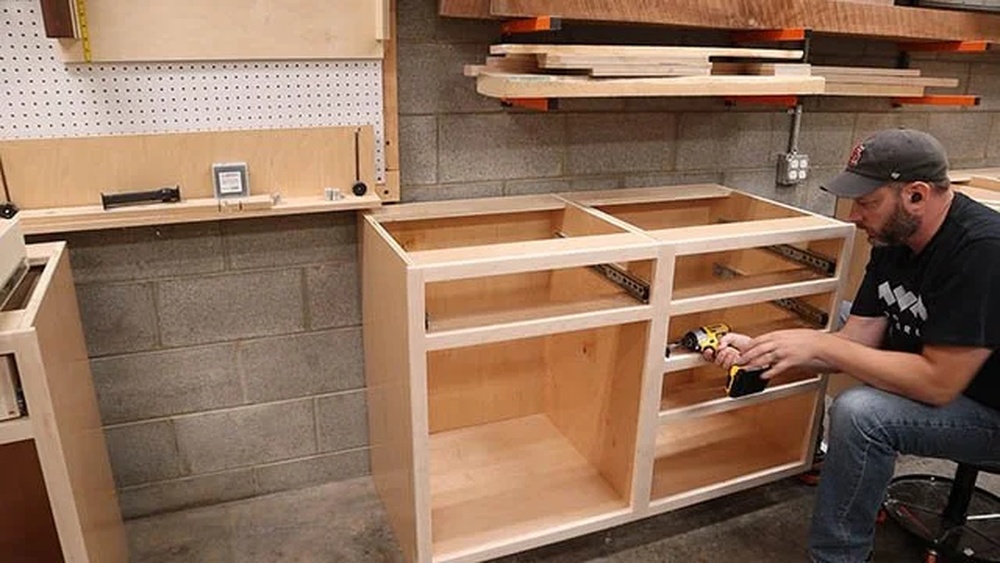
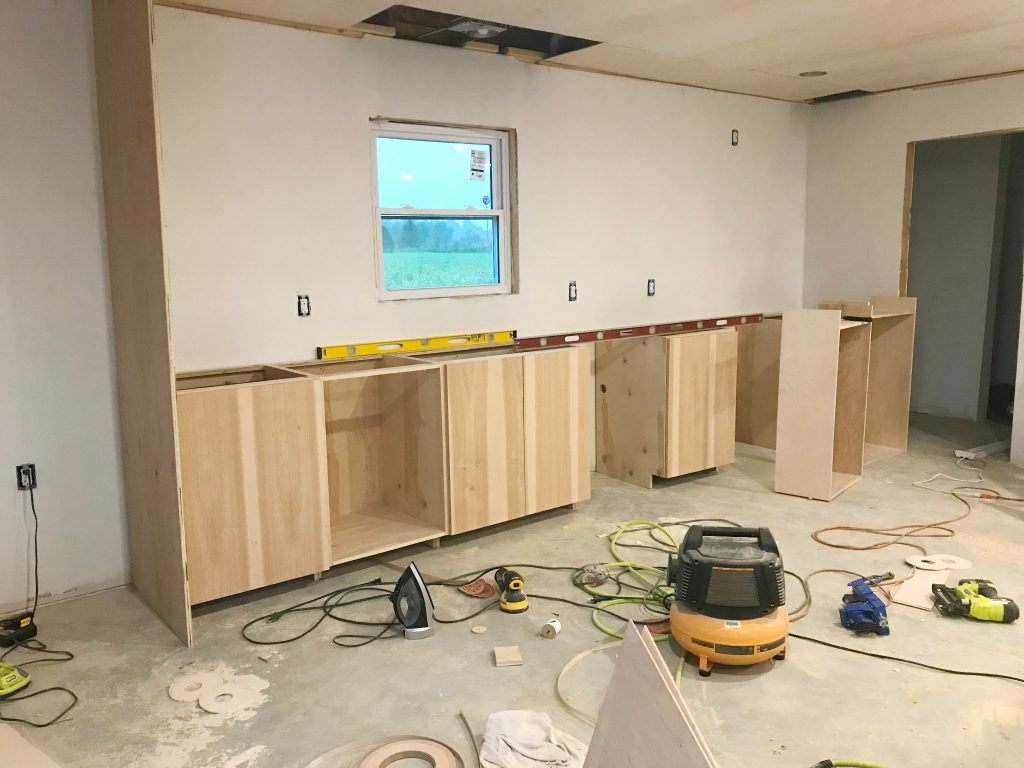
Assembling The Cabinet Box
Joining panels requires aligning edges carefully. Use clamps to hold the panels tight. Drill pilot holes to avoid splitting the wood. Secure panels with screws or nails for a strong hold. Check corners to keep them square for a neat cabinet box.
Installing shelves means deciding shelf height first. Mark shelf positions on the inside walls. Use sturdy wood or plywood for shelves. Place shelves on supports or cleats fixed to the cabinet sides. Make sure shelves sit level to hold items safely.
Drilling shelf pin holes allows adjustable shelves inside the cabinet. Measure equal distances from the top and bottom. Use a drill with a bit size that fits the pins snugly. Drill holes in vertical rows on both sides. Keep holes straight to avoid loose shelves.
Building Faceframes And Doors
Start by cutting the pieces for the faceframe. Use hardwood like maple or oak for strength. Join the frame parts with wood glue and clamps. Nail or screw the pieces for extra hold. Make sure the frame is square before the glue dries.
For Shaker style doors, cut a flat center panel and simple frame parts. Join the frame with strong glue and clamps. The design is clean and easy to make. Sand the doors smooth before finishing.
Attach door hardware like hinges and knobs last. Use a drill to make pilot holes. Place hinges carefully to let the door open and close well. Check the door fits the cabinet frame perfectly before screwing all parts tight.
Creating Drawers
Cutting drawer parts means measuring and cutting wood pieces for the box. Use a saw to cut sides, front, back, and bottom. Make sure all pieces are the same size for a neat fit. Sand edges smooth to avoid splinters.
Assembling drawer boxes starts by joining the sides to the front and back. Use wood glue and screws or nails for strong joints. Insert the bottom panel into the groove or attach it to the frame. Check that the box is square with a carpenter’s square.
Installing drawer slides requires attaching metal tracks to the drawer sides and cabinet inside. Match the slides carefully so drawers open and close smoothly. Use a level to keep slides straight. Test the drawer by sliding it in and out several times.
Finishing Touches
Sanding surfaces smooths the wood and removes rough spots. Use fine-grit sandpaper for a clean finish. Always sand along the wood grain to avoid scratches. Dust off all particles before painting or staining.
Painting or staining cabinets changes their look and adds color. Use thin, even coats for the best result. Let each coat dry fully before adding another. Choose paint or stain that suits your kitchen style.
Applying protective coats helps keep cabinets safe from damage. Clear polyurethane or varnish works well. Apply thin layers with a brush or cloth. Allow drying time between coats for a strong finish.
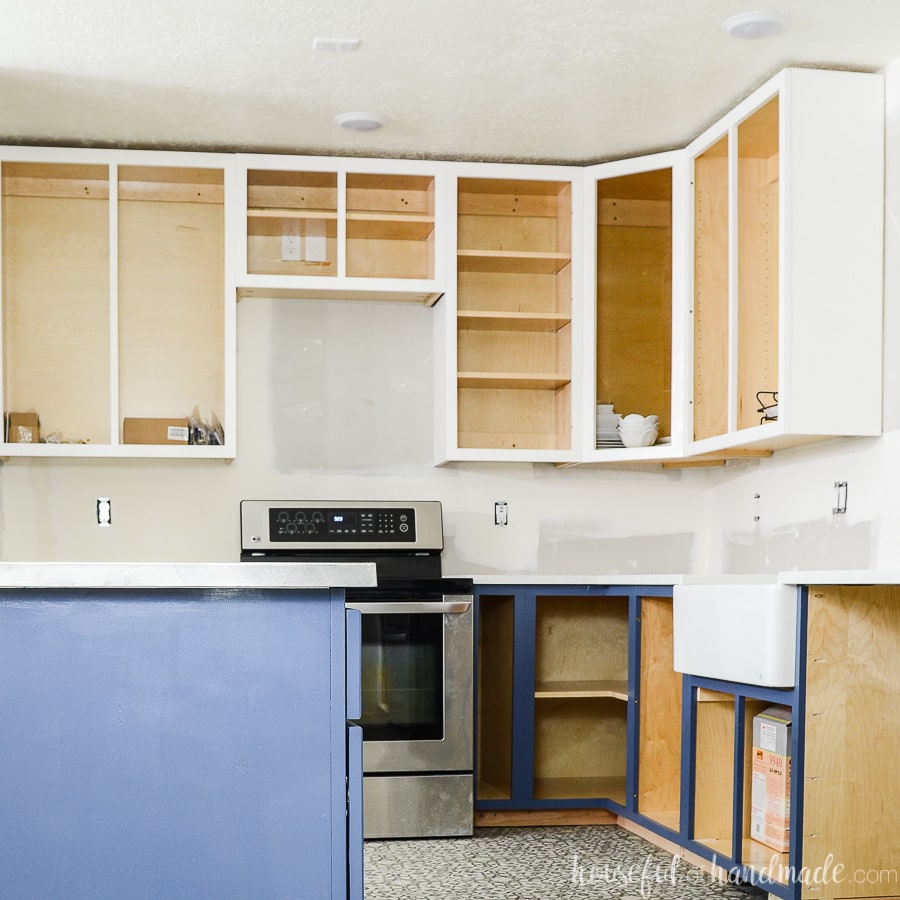
Installing Cabinets
Start by marking the wall layout. Use a level and pencil to draw lines where cabinets will hang. Make sure lines are straight and at the right height. Check for studs behind the wall using a stud finder. Mark stud locations clearly. This helps to secure cabinets firmly and safely.
Next, secure the cabinets to the wall. Lift each cabinet carefully and align it with your marks. Use screws that are long enough to reach the studs. Screw through the cabinet’s back panel into the studs. Tighten screws evenly to avoid gaps or tilting.
Finally, adjust doors and drawers. Check that doors open smoothly and drawers slide correctly. Use a screwdriver to tweak hinges and drawer slides. Adjust gaps between doors for a clean look. Ensure all parts fit well before finishing.

Cost And Time Considerations
Material costs depend on wood type and hardware quality. Plywood or MDF is usually cheaper than solid wood. Budget for hinges, handles, and screws too. Expect to spend around $200 to $600 on materials for a basic set of cabinets.
Tools like saws, drills, clamps, and sanders are essential. If you don’t own them, buying or renting adds to costs. A basic tool kit might cost $300 to $700. Renting can lower expenses but takes more planning.
| Step | Time Needed |
|---|---|
| Cutting Pieces | 2-4 hours |
| Assembling Cabinet Frame | 4-6 hours |
| Installing Shelves and Doors | 3-5 hours |
| Sanding and Finishing | 3-4 hours |
Building cabinets takes several days to a week. Time varies by skill and project size. Planning and patience help keep the process smooth.
Tips For Beginners
Common mistakes include rushing cuts and ignoring measurements. Always double-check sizes before cutting wood. Avoid using the wrong type of wood; it can weaken your cabinets.
Practice basic woodworking skills like sanding and drilling. These skills help you make cleaner cuts and smoother finishes. Start with small projects to build confidence.
Templates and jigs keep your cuts consistent. They help you make repeatable and accurate cuts. Using jigs saves time and reduces errors, especially when cutting multiple pieces.
Alternatives To Building
Ready-to-assemble cabinets offer a simple and quick option for kitchen updates. They come in flat packages and need only basic tools for assembly. This choice saves time and is often less expensive than custom builds.
Modifying stock cabinets allows some customization without full construction. You can change the finish, add trim, or adjust sizes to better fit your space. This option balances cost and personalization well.
For those wanting expert help, hiring professionals is the best choice. They bring experience and skill to create cabinets that fit perfectly and last long. It costs more but reduces stress and errors.
Frequently Asked Questions
Is It Cheaper To Build Your Own Kitchen Cabinets?
Building your own kitchen cabinets can save money if you have tools, skills, and time. Otherwise, costs may rise.
Can A Beginner Build Cabinets?
Yes, beginners can build cabinets by following step-by-step guides and practicing basic woodworking skills carefully.
What Kind Of Wood To Use To Build Cabinets?
Use hardwoods like maple, oak, cherry, or birch for durable, attractive cabinets. Softwoods like pine suit budget builds. Choose wood based on style, strength, and finish preferences.
Can You Build Your Own Kitchen Cupboards?
Yes, you can build your own kitchen cupboards with proper tools, woodworking skills, and time. This approach saves money and allows full customization. However, it demands precision and patience to avoid costly mistakes. Beginners might consider ready-to-assemble cabinets or modifying stock units as easier alternatives.
Conclusion
Building kitchen cabinets takes time and patience but is rewarding. Start with a clear plan and gather quality materials. Cut and assemble pieces carefully to ensure a good fit. Customize designs to match your kitchen’s style and needs. Take your time with finishing touches like sanding and painting.
With practice, your skills will improve, and results will look professional. Building cabinets yourself saves money and adds personal value. Enjoy the process and the pride in your handmade kitchen cabinets.

Yes, working as , Food Blogger and Product Reviewer for last 6 years. Here you will get amazing deals for Smart kitchen products. I am your best source for the latest update in cooking trends. I provide insightful articles, reviews, and analysis on cutting-edge kitchen gadget. My mission is to empower readers with the knowledge they need to stay ahead in a rapidly evolving coking world. Join me as we explore the future of food technology and how it shapes our lives today and tomorrow.