
Imagine walking into your kitchen, ready to whip up a delightful meal, only to find your appliances looking less than inviting. You want your kitchen to be a place of inspiration, not a source of stress.
If you’ve ever felt overwhelmed by the grime and grease on your stove or the mysterious odors wafting from your refrigerator, you’re not alone. The good news is, with the right techniques, you can transform your kitchen appliances into sparkling clean powerhouses that not only look great but function even better.
In this guide, you’ll discover simple, effective steps to tackle the dirt and grime, so you can enjoy a cleaner, more efficient kitchen. Ready to take control of your kitchen cleanliness? Let’s dive in and unlock the secrets to shining appliances.
Essential Cleaning Tools
Cleaning kitchen appliances requires essential tools like microfiber cloths, gentle scrub brushes, and non-abrasive cleaners. Wipe surfaces regularly to remove grime and stains. Maintain efficiency and hygiene in your kitchen by using these tools effectively.
Cleaning kitchen appliances is vital for maintaining a healthy home. Essential cleaning tools make this task easier. They help remove dirt and grime effectively. With the right tools, cleaning becomes less of a chore. You can achieve a sparkling kitchen in no time.Must-have Supplies
For effective cleaning, stock up on basic supplies. Microfiber cloths are great for wiping surfaces. They attract dust and dirt easily. Brushes with soft bristles are perfect for scrubbing. They reach crevices and corners effortlessly. Dish soap is a must for greasy areas. It cuts through oil stains quickly. Baking soda is excellent for tough spots. It acts as a mild abrasive cleaner. White vinegar helps dissolve mineral deposits. It is especially useful for kettles and coffee makers.Eco-friendly Alternatives
Eco-friendly options reduce environmental impact. Natural cleaning agents work well without chemicals. Lemon juice is a powerful cleaner and deodorizer. It leaves appliances smelling fresh. Hydrogen peroxide is a great disinfectant. Use it for sanitizing surfaces safely. Castile soap is a versatile cleaner. It is made from plant oils and is gentle. Essential oils add fragrance to cleaning solutions. They also have antibacterial properties. Use reusable cleaning cloths to minimize waste. They are durable and can be washed many times.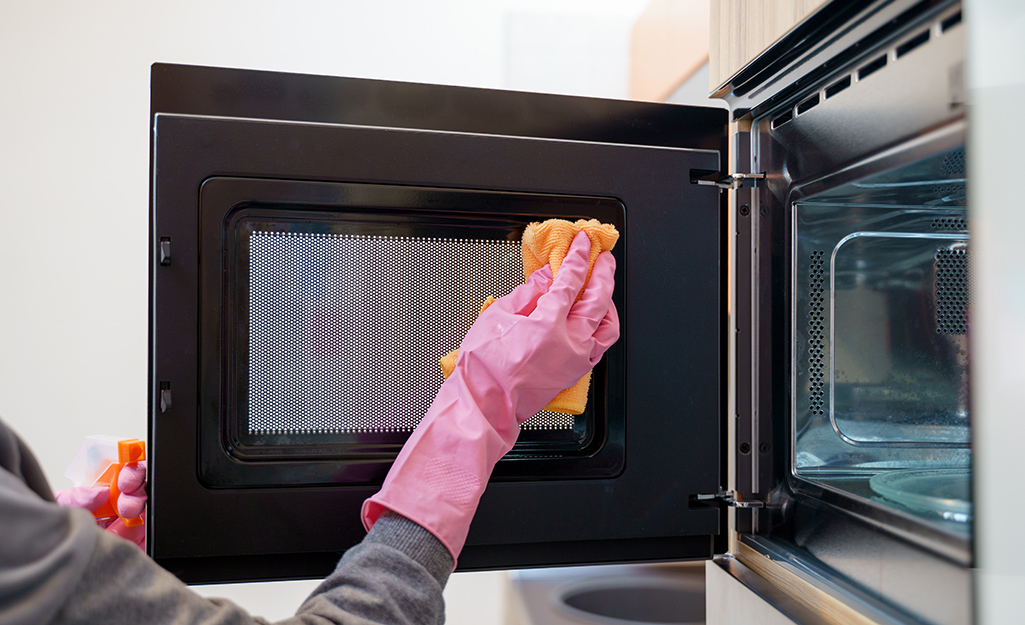
Credit: www.homedepot.com
Refrigerator Care
Keeping your refrigerator in top-notch condition is crucial for preserving the freshness of your food. A clean fridge not only helps in maintaining hygiene but also optimizes its efficiency, saving energy and money. Whether you’re tackling stubborn stains or organizing shelves, the following tips will make refrigerator care less daunting. Let’s dive into some practical steps for cleaning the interior and exterior of your fridge.
Interior Cleaning Steps
Start by removing all items from the refrigerator. This is a great opportunity to check expiration dates and toss anything spoiled.
Once empty, take out the removable shelves and drawers. Soak them in warm, soapy water to loosen grime and stains. A sponge works wonders here.
Wipe down the interior walls with a mixture of water and baking soda. This natural solution neutralizes odors and breaks down stubborn spots.
Don’t forget those tricky corners. Use an old toothbrush to scrub around seals and hinges, ensuring no dirt is left behind.
Before replacing items, dry the shelves and drawers thoroughly. Organize your food items methodically to make future cleaning easier.
Exterior Maintenance Tips
Begin by unplugging your fridge for safety. This simple step prevents any electrical mishaps while cleaning.
Dust off the top and sides. A microfiber cloth is perfect for catching dust without scratching surfaces.
For stainless steel finishes, use a specific cleaner or a mixture of vinegar and water. This combination leaves a sparkling, streak-free shine.
Clean the door handles and edges. These areas often harbor germs from frequent touch.
Regularly check the door seals. If they’re worn out, replace them to maintain energy efficiency and ensure the door closes tightly.
Does your refrigerator have a spot that always gets dirty quickly? Addressing these areas regularly can save you from bigger cleaning jobs later on. By taking small steps, you can ensure your refrigerator stays clean and efficient, making your kitchen a more pleasant place to be.
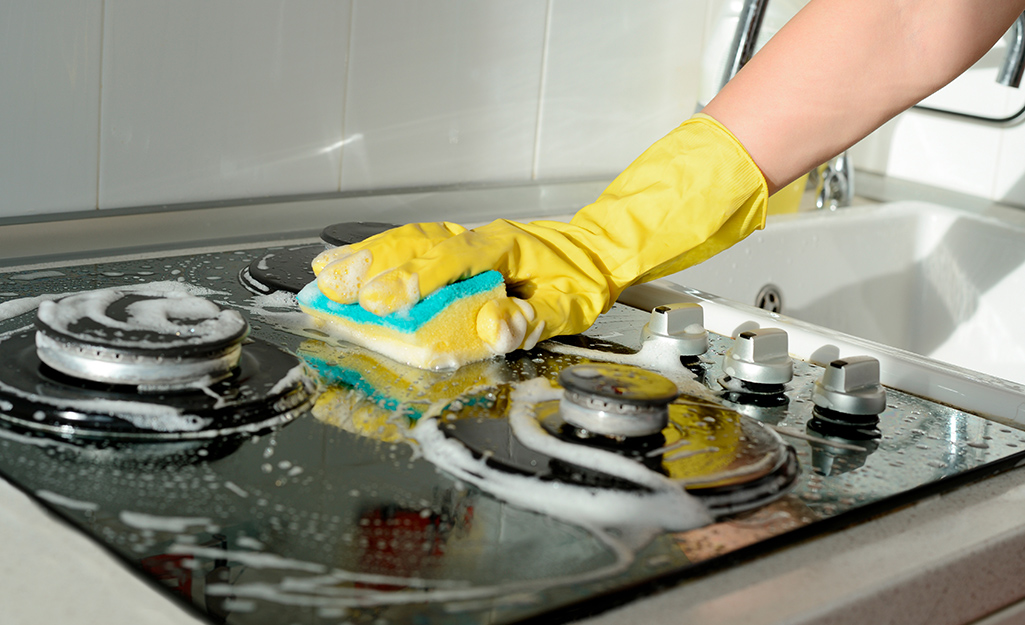
Oven And Stovetop
Cleaning the oven and stovetop ensures better performance and hygiene. Remove burners and soak them in soapy water. Wipe surfaces with a damp cloth for spotless appliances.
Cleaning your kitchen appliances is essential for maintaining a hygienic cooking environment. The oven and stovetop, in particular, are often the heart of your kitchen, where culinary magic happens. However, they can quickly become a mess with spills, splatters, and baked-on food. Keeping them clean not only ensures better performance but also prolongs their lifespan. Let’s dive into practical steps for cleaning your oven and stovetop.Removing Grease And Grime
Begin by tackling the grease and grime, which can be stubborn enemies. A simple mixture of baking soda and water can work wonders. Create a paste by mixing them in equal parts and apply it generously to the greasy areas. Let it sit for at least 15 minutes to break down the grime. For tougher stains, you might want to add vinegar to the mix. Spray vinegar over the baking soda paste, causing a fizzy reaction that helps lift the dirt. Use a non-abrasive sponge or cloth to scrub the surface gently. Rinse with warm water and wipe dry with a clean towel. Don’t forget the stovetop burners. Remove them and soak in hot, soapy water for a few hours. This will loosen any stuck-on food. Scrub gently with a brush, rinse, and dry before placing them back.Self-cleaning Function Use
If your oven comes with a self-cleaning function, you’re in luck. This feature can simplify your cleaning routine significantly. Before you start, ensure your kitchen is well-ventilated, as the process can produce smoke or odors. Remove any racks and items inside the oven. Activate the self-cleaning function, and let the oven work its magic. The intense heat will turn residue into ash, which you can easily wipe away with a damp cloth once the cycle is complete. It’s crucial to read your oven’s manual before using this feature for the first time. Some models might have specific instructions or precautions. Remember, regular use of the self-cleaning function can save you a lot of elbow grease. Have you ever discovered an easier way to clean your oven or stovetop? Share your tips in the comments below!Microwave Maintenance
Keeping your microwave clean is essential for its longevity. It enhances food safety too. A clean microwave prevents odors and contamination. Regular maintenance ensures your appliance works efficiently. Let’s explore effective methods for microwave maintenance.
Steam Cleaning Method
Steam cleaning is an easy way to clean your microwave. Fill a microwave-safe bowl with water. Add a few slices of lemon for a fresh scent. Heat the bowl for five minutes. Let it sit for another five minutes. The steam will loosen grime and food particles. Wipe the interior with a damp cloth. Make sure to clean the door and buttons too.
Deodorizing Techniques
Unpleasant odors can linger in your microwave. Baking soda is a simple deodorizer. Place a small open bowl of baking soda inside. Leave it overnight to absorb smells. Vinegar also works wonders. Mix equal parts of water and vinegar in a bowl. Heat for two minutes, then wipe clean. Both methods leave your microwave smelling fresh.
Dishwasher Detailing
Keeping your kitchen dishwasher in top shape is essential for hassle-free dishwashing. A well-maintained dishwasher not only ensures sparkling clean dishes but also extends the appliance’s lifespan. Whether you’re a seasoned cook or a casual home chef, understanding the ins and outs of dishwasher detailing can save you time and money. Let’s dive into some practical tips for maintaining your dishwasher, focusing on the crucial aspects of filter and spray arm cleaning, as well as preventing odors.
Filter And Spray Arm Cleaning
The filter and spray arms are the heart of your dishwasher’s cleaning power. Over time, food particles and debris can clog these components, reducing efficiency. Regular cleaning is a simple way to keep your dishwasher running smoothly.
Start by removing the lower rack to access the filter. Carefully take out the filter and rinse it under warm water. Use a soft brush to remove stubborn residues. A clean filter ensures water flows freely, enhancing cleaning performance.
Next, inspect the spray arms. Look for any blockages in the tiny holes. Use a toothpick or a small brush to clear any debris. This allows water to reach all corners of your dishes, ensuring a thorough clean.
Preventing Odors
Dishwasher odors can be unpleasant and affect your kitchen’s ambiance. Regular maintenance helps keep odors at bay. Start by checking the door seal for any trapped food particles. Wipe it down with a damp cloth.
Consider running a cycle with a cup of vinegar placed on the top rack. Vinegar naturally neutralizes odors and breaks down any mineral deposits. You can also sprinkle baking soda at the bottom of the dishwasher before a cycle for added freshness.
Ensure you regularly clean the dishwasher’s interior. You might be surprised how much a simple wipe-down can do. Have you ever noticed how a clean dishwasher makes your kitchen feel more inviting?
By focusing on these aspects of dishwasher detailing, you can enjoy a clean and efficient appliance. What methods do you use to maintain your kitchen gadgets? Share your tips and keep the conversation going!
:max_bytes(150000):strip_icc()/clean-small-kitchen-appliances-4153520-05-58415d047a2a49dd87b1e8a1bdb3d6ed.jpg)
Credit: www.thespruce.com
Coffee Maker Upkeep
Keeping your coffee maker clean ensures better-tasting coffee. It also prolongs the life of the appliance. Regular upkeep can prevent build-up that affects performance. Follow these simple steps to maintain your coffee maker.
Descaling Process
Descaling removes mineral deposits from your coffee maker. Use a descaling solution or vinegar. Mix equal parts water and vinegar. Pour the mixture into the water reservoir. Turn the coffee maker on and run a cycle. Pause midway to let the solution sit for 30 minutes. Finish the cycle to rinse the machine thoroughly.
Run two more cycles with just water. This removes any remaining vinegar taste. Repeat the descaling every two months. This ensures your coffee maker runs smoothly.
Cleaning The Carafe
The carafe collects coffee oils and stains. Fill it halfway with warm water. Add a few drops of dish soap. Use a soft sponge to scrub inside the carafe. Pay attention to the corners where stains accumulate. Rinse with clean water and dry with a towel.
For stubborn stains, use baking soda. Sprinkle baking soda into the carafe. Scrub gently with a sponge. Rinse thoroughly after cleaning. Your carafe will look and smell fresh.
Blender And Food Processor
Blender and food processor cleaning can be quick and simple. First, unplug and disassemble all removable parts. Use warm soapy water to wash blades and containers, scrubbing gently with a sponge. Dry thoroughly before reassembling to prevent rust and ensure optimal performance.
Cleaning your blender and food processor can transform your kitchen experience. These appliances are your trusty companions, helping you whip up smoothies, soups, and sauces. But over time, they gather residue and stains that can affect their efficiency and hygiene. How do you ensure they stay spotless and efficient? Let’s dive into practical tips for cleaning the blades and jug, and tackling those stubborn stains that just won’t budge.Blade And Jug Cleaning
The blades are the heart of your blender and food processor. They tackle everything from soft fruits to hard nuts. But they also collect residue and become sticky. After each use, immediately rinse the blades under warm water. This prevents food from hardening and makes cleaning easier. For a deeper clean, fill the jug halfway with warm water and add a drop of dish soap. Run the appliance for a few seconds. This helps dislodge stuck particles, especially around the blades. Consider using a toothbrush for stubborn bits. Its bristles reach tight spots, ensuring a thorough clean. Remember, regular cleaning extends the life of your appliance. Have you ever noticed a change in your smoothie texture? A clean blade can make all the difference!Removing Stubborn Stains
Stains can be persistent, often lurking in the corners of your jug. They can be more than just unsightly; they might impact the taste of your food. To tackle these stains, try a mixture of baking soda and water. Apply this paste to the stained areas and let it sit for a few minutes. Scrub gently with a soft cloth or sponge. Baking soda’s mild abrasiveness helps remove stains without scratching the surface. For tough stains, consider soaking the jug in vinegar. Its acidity breaks down food particles. Rinse thoroughly afterward to remove any lingering vinegar smell. Have you ever found a stain that just wouldn’t quit? Patience and persistence pay off. Regular upkeep prevents these stains from becoming permanent. Cleaning your blender and food processor need not be a chore. With these straightforward tips, you can maintain their efficiency and hygiene effortlessly. What’s your secret cleaning hack for kitchen appliances?
Credit: blog.service.works
Toaster And Toaster Oven
Toasters and toaster ovens are kitchen essentials. They make mornings easier by quickly toasting bread. Yet, they can get dirty fast. Crumbs and grease build up over time. This affects both performance and safety. Regular cleaning keeps them efficient and safe.
Crumb Tray Maintenance
The crumb tray collects food debris. It needs frequent attention. Remove the tray weekly for cleaning. Dump crumbs into the trash. Wash the tray with warm, soapy water. Rinse and dry it well. A clean tray prevents burnt smells and fires.
Cleaning Heating Elements
Heating elements can gather grease and residue. To clean, unplug the appliance first. Use a soft brush to remove debris. Avoid using water directly on the elements. This can damage them. Clean elements ensure even toasting. They also extend the appliance’s life.
Frequently Asked Questions
How Do I Clean A Greasy Microwave?
Unplug. Mix water and vinegar. Heat in microwave for 5 minutes. Wipe with cloth.
What’s The Best Way To Clean A Blender?
Fill with warm water. Add dish soap. Run blender for 30 seconds. Rinse thoroughly.
How Can I Clean A Burnt Oven?
Remove racks. Use baking soda paste on burnt areas. Let sit overnight. Wipe clean.
What Is The Safest Way To Clean A Toaster?
Unplug. Remove crumbs. Clean with a damp cloth. Avoid getting water inside.
Conclusion
Cleaning kitchen appliances is easy with the right steps. Regular care keeps them working well. Clean after each use to prevent dirt build-up. Use mild cleaners for safety. Scrub gently to avoid scratches. Check manuals for specific cleaning tips. This keeps appliances in good shape.
A clean kitchen saves time and effort. It also enhances your cooking experience. Enjoy a tidy space and fresh meals every day. Simple habits make a big difference. Start today, and keep your kitchen appliances spotless!

Yes, working as , Food Blogger and Product Reviewer for last 6 years. Here you will get amazing deals for Smart kitchen products. I am your best source for the latest update in cooking trends. I provide insightful articles, reviews, and analysis on cutting-edge kitchen gadget. My mission is to empower readers with the knowledge they need to stay ahead in a rapidly evolving coking world. Join me as we explore the future of food technology and how it shapes our lives today and tomorrow.