Are you ready to transform your kitchen with cabinets that perfectly fit your style and space? Creating your own kitchen cabinets might seem like a big task, but with the right guidance, you can build beautiful, custom storage solutions that save you money and add real value to your home.
Imagine having full control over the design, materials, and finish—making your kitchen truly one of a kind. You’ll discover step-by-step how to create kitchen cabinets that look professional and function flawlessly. Whether you’re a beginner or have some DIY experience, this guide will walk you through the process, helping you avoid common mistakes and achieve stunning results.
Let’s get started on making your dream kitchen a reality!
:strip_icc()/7003788_DeMattia_0279-e283f1f497224852a79f1fe1ab271f00.jpg)
Materials And Tools
Choosing the right wood type is key for strong kitchen cabinets. Hardwoods like oak, maple, and cherry are popular. They last long and look nice. Plywood is also common because it resists warping and is affordable. Avoid softwoods like pine for cabinet frames as they dent easily.
Essential tools include a circular saw, drill, screwdriver, clamps, and measuring tape. A router helps shape edges. Sandpaper smooths surfaces before finishing. A level ensures your cabinets hang straight.
| Safety Gear | Purpose |
|---|---|
| Safety glasses | Protect eyes from dust and debris |
| Ear protection | Reduce noise from power tools |
| Dust mask | Prevent breathing sawdust |
| Work gloves | Protect hands from splinters and cuts |
Planning Your Cabinets
Start by measuring your kitchen space carefully. Use a tape measure to get the height, width, and depth of the area. Write down all numbers. Double-check to avoid mistakes. Knowing the exact space helps avoid problems later.
Plan your cabinet layout by thinking about how you use your kitchen. Place cabinets near the stove, sink, and refrigerator for easy access. Think about storage needs like pots, pans, and dishes. Keep walkways clear and allow enough space for doors to open fully.
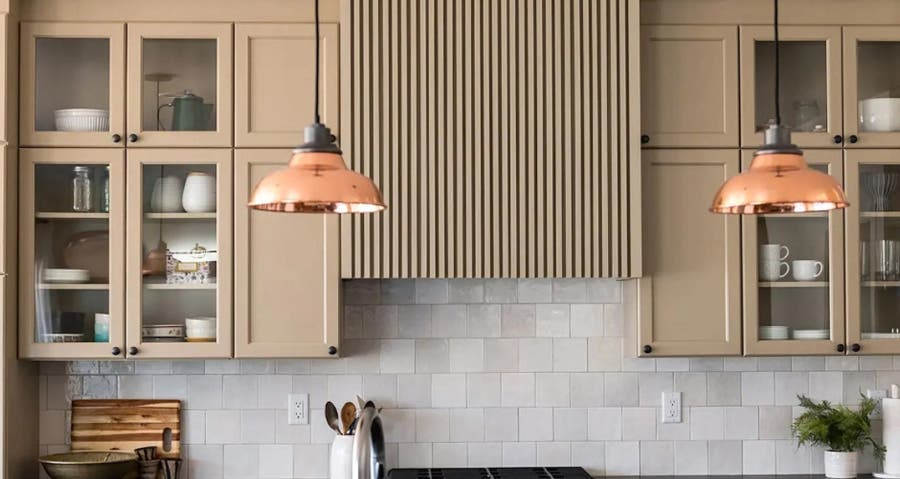
Choose cabinet styles and features that fit your kitchen style. Options include shaker, flat-panel, or raised-panel doors. Pick materials like wood, plywood, or MDF. Decide on finishes such as paint, stain, or laminate. Add features like soft-close hinges, pull-out shelves, or glass doors for convenience and beauty.
Cutting And Preparing Pieces
Start by cutting panels and boards to the right size. Use a saw that fits your project, like a table saw or circular saw. Make sure the cuts are straight and clean for better assembly later.
Next, sand and smooth all edges to avoid rough spots. Use sandpaper or a sanding block with medium grit. Smooth edges help pieces fit well and prevent splinters during handling.
Drill holes carefully for screws or dowels. Mark the spots before drilling to keep holes aligned. Use a drill bit that matches the screw size to ensure a secure fit. This step is key for strong cabinet joints.
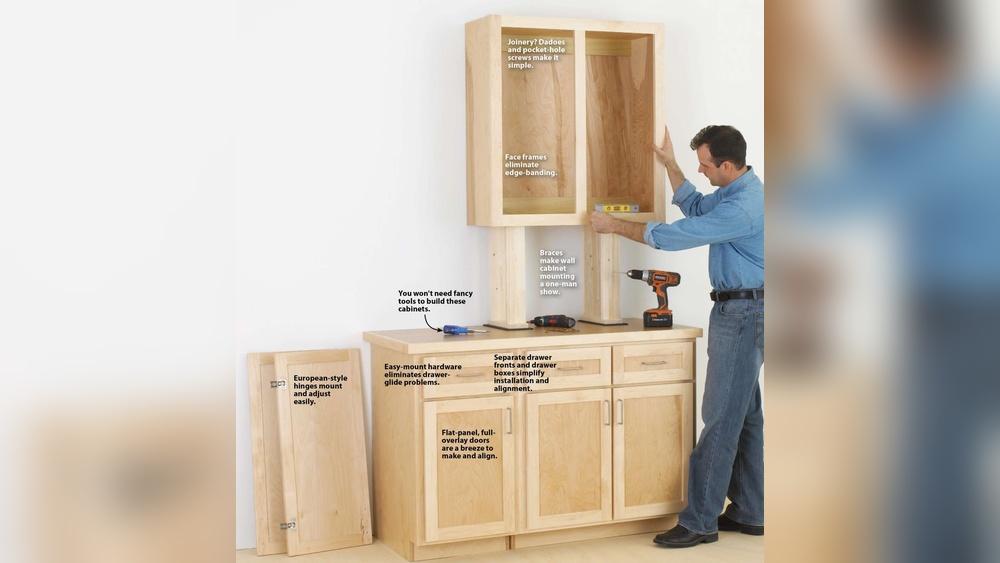
Building The Cabinet Box
Start by assembling the side panels. Use strong wood or plywood for durability. Attach the panels with screws or nails. Make sure they are square and aligned for a sturdy frame.
Next, attach the bottom and top panels. These panels connect the side panels together. Use clamps to hold pieces in place. Secure with screws for extra strength. Check the corners for right angles.
Finally, install the shelves. Measure the inside width of the cabinet. Cut shelves to fit snugly. Use shelf pins or brackets to support them. Make sure shelves are level and stable.
Creating Faceframes
Start by measuring and cutting the frame pieces precisely. Use quality wood for strength. Each piece should fit well to avoid gaps.
Join the frame components using strong joints like pocket holes or dowels. Make sure corners are square and flush. Clamps help hold parts tightly while glue or screws dry.
Attach the completed faceframes to the cabinet boxes securely. Use screws or nails from inside the box to hide fasteners. Check that frames are aligned and flush with the box edges for a neat finish.
:strip_icc()/20190521_meredith_002-2ad3962f1e604e499b8ce59ebe6481c6.jpg)
Constructing Doors And Drawers
Shaker style doors are simple and clean. Use flat panels and square edges. Cut wood pieces to size. Join the frame with strong glue and screws. Sand the edges smooth for a neat look.
Drawer boxes need sturdy sides and bottoms. Use plywood for strength. Cut pieces accurately and assemble with nails or screws. Check that corners are square. Sand all surfaces before finishing.
Installing drawer slides requires careful measuring. Attach slides inside the cabinet frame. Make sure they are level and aligned. Test the drawer to slide smoothly without sticking. Adjust if needed for perfect fit.
Finishing Touches
Painting or staining cabinets gives them a fresh, clean look. Choose paint for a bright, solid color. Stain shows the wood grain and adds warmth. Use a brush or spray for even coverage. Let each coat dry before adding more.
Hardware like knobs and handles makes cabinets easier to use. Pick styles that match your kitchen’s style. Measure carefully to drill holes in the right spots. Secure the hardware tightly to avoid loosening.
Sealing surfaces protects wood from water and stains. Apply a clear coat or varnish over paint or stain. This layer keeps cabinets strong and looking new. Use a soft brush and apply thin, smooth coats.
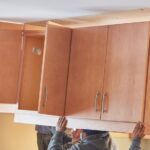
Installation Process
Start by cleaning and smoothing the wall surface where cabinets will hang. Remove nails, screws, and any debris. Use a level to check if the wall is flat. Fix any bumps or holes with filler. This helps cabinets sit flush and look neat.
Secure cabinets by finding wall studs with a stud finder. Use strong screws long enough to hold cabinet weight. Drill pilot holes in the cabinet back to avoid wood splitting. Attach each cabinet firmly to the wall studs for safety and durability.
Align cabinets by placing a level on top to check horizontality. Shim under cabinets if needed to make them perfectly level. Join cabinets side by side, using clamps to hold them tight. Screw cabinets together through their side panels for a seamless look.
Cost And Time Considerations
Budgeting materials involves choosing wood types, hardware, and finishes. Plywood is common and cost-effective. Solid wood costs more but lasts longer. Hardware like hinges and handles vary in price. Paint or stain adds to the budget. Small mistakes can increase costs, so plan carefully.
Estimating labor time depends on skill level and tools. Beginners may need weeks; experts might finish in days. Cutting, assembling, sanding, and finishing take time. Allow extra hours for unexpected problems. Work steadily to avoid rush and errors.
| Option | Cost | Time | Customization | Skill Needed |
|---|---|---|---|---|
| DIY Cabinets | Lower if tools owned | Long (weeks) | High | High woodworking skills |
| Buying Stock Cabinets | Lower | Short (days) | Low | None |
| Buying Semi-Custom | Medium | Medium | Medium | None |
| Buying Fully Custom | High | Medium | High | None |
Tips For Beginners
Avoiding common mistakes is key to successful cabinet making. Always measure twice and cut once to prevent costly errors. Using the wrong wood or hardware can weaken the cabinets. Take time to plan the design clearly before starting any cuts.
Learning basic woodworking skills helps in creating strong and neat cabinets. Practice using saws, drills, and clamps safely. Understanding how to join pieces with screws or nails improves durability. Sanding and finishing skills give a smooth, polished look to your work.
Using tutorials and resources speeds up learning. Step-by-step videos and guides show proper techniques. Online forums offer helpful tips from other beginners. Books and workshops provide detailed information and hands-on experience.
Frequently Asked Questions
Is It Cheaper To Build Your Own Cabinets Or Buy Them?
Building your own cabinets can be cheaper if you have skills, tools, and time. Buying saves labor and time but costs more. A hybrid approach balances cost and effort.
Can A Beginner Build Cabinets?
Yes, beginners can build cabinets by following clear plans and tutorials. Basic woodworking skills and patience help achieve good results. Starting with simple designs improves confidence and skills over time.
How Do I Decide Where To Put Things In My Kitchen?
Place frequently used items within easy reach, group similar items together, and store heavy items lower for safety and convenience.
What Type Of Wood Do You Use To Make Cabinets?
We use hardwoods like maple, oak, cherry, and birch for durable, high-quality cabinets. These woods offer strength and beauty.
Conclusion
Creating your own kitchen cabinets takes time and patience. Use simple tools and follow clear steps for best results. Custom cabinets fit your space perfectly and reflect your style. Remember to measure carefully and choose quality materials. Building cabinets can save money if you enjoy woodworking.
Otherwise, consider buying or mixing both methods. Enjoy the process and the pride in your handiwork. Your kitchen will look unique and feel more personal with your own cabinets. Keep practicing, and skills will improve over time.

Yes, working as , Food Blogger and Product Reviewer for last 6 years. Here you will get amazing deals for Smart kitchen products. I am your best source for the latest update in cooking trends. I provide insightful articles, reviews, and analysis on cutting-edge kitchen gadget. My mission is to empower readers with the knowledge they need to stay ahead in a rapidly evolving coking world. Join me as we explore the future of food technology and how it shapes our lives today and tomorrow.