Thinking about updating your kitchen or tackling a renovation project? One of the first—and often most daunting—steps is removing your kitchen cabinets.
You might wonder: Can you do it yourself without causing damage? Is it complicated or messy? The good news is, with the right approach and tools, removing kitchen cabinets can be a straightforward process. In this guide, you’ll discover simple, step-by-step instructions that make cabinet removal easier than you imagined.
By the end, you’ll feel confident to take on the task yourself and move closer to the kitchen makeover you’ve been dreaming of. Keep reading to learn how to remove kitchen cabinets safely and efficiently—your future kitchen transformation starts here!
Tools And Materials
Essential tools for cabinet removal include a screwdriver, drill, crowbar, and utility knife. A stud finder helps locate wall studs for safe detachment. A hammer may be needed to loosen stubborn nails or screws.
Safety gear is important. Wear gloves to protect your hands from sharp edges. Safety glasses shield your eyes from dust and debris. A dust mask keeps you safe from inhaling particles.
Preparing the workspace means clearing the area. Remove items from cabinets and countertops. Place a drop cloth on the floor to catch debris. Turn off the power if cabinets have lighting or electrical outlets. Have a helper assist for better control and safety.
:max_bytes(150000):strip_icc()/how-to-remove-kitchen-cabinets-8304279-hero-30b6ec50f04347ea8ef6dd85178cab25.jpg)
Preparing Cabinets
Emptying cabinets is the first step before removal. Take out all dishes, utensils, and food items. This makes the cabinets lighter and safer to handle. Wipe the inside to clean dust and crumbs.
Next, remove doors and drawers. Use a screwdriver to take off the hinges and screws carefully. Keep the screws in a small container to avoid losing them. Take out drawers by pulling them straight out.
Label each part to make reassembly easier. Use sticky notes or tape and write the cabinet or drawer number. This helps you remember where each piece belongs later on.
Locating Fasteners
Start by locating screws or nails holding the cabinets. These fasteners are usually found inside the cabinet frame near the top or sides. Use a flashlight to help spot them clearly.
Check the wall for studs. Cabinets are often attached to these wooden studs for strong support. A stud finder tool can make this easier. Mark the stud locations with a pencil.
Some cabinets might be stuck with glue along with screws. Gently try to pull the cabinet away from the wall. If it resists, use a putty knife to loosen the glue carefully without damaging the wall or cabinet.
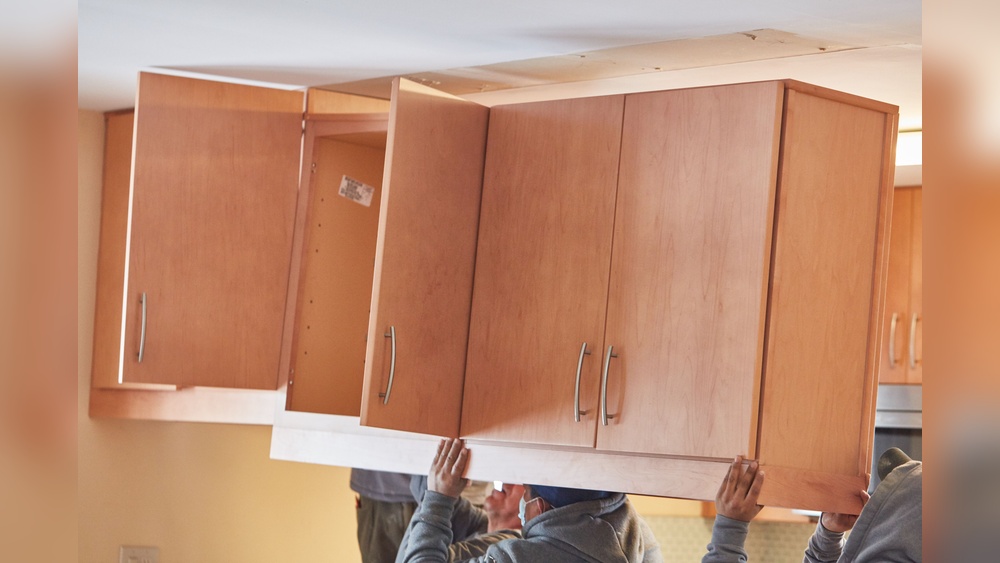
Removing Upper Cabinets
Support the cabinet from below using a sturdy board or a helper. This keeps it steady and prevents falls.
Locate the screws or fasteners holding the cabinet to the wall and sides. Use a drill or screwdriver to remove all screws carefully. Be patient if screws are tight.
Sometimes cabinets stick due to glue or paint. Gently tap with a putty knife or pry bar to loosen stuck areas. Avoid damaging the wall or cabinet edges.
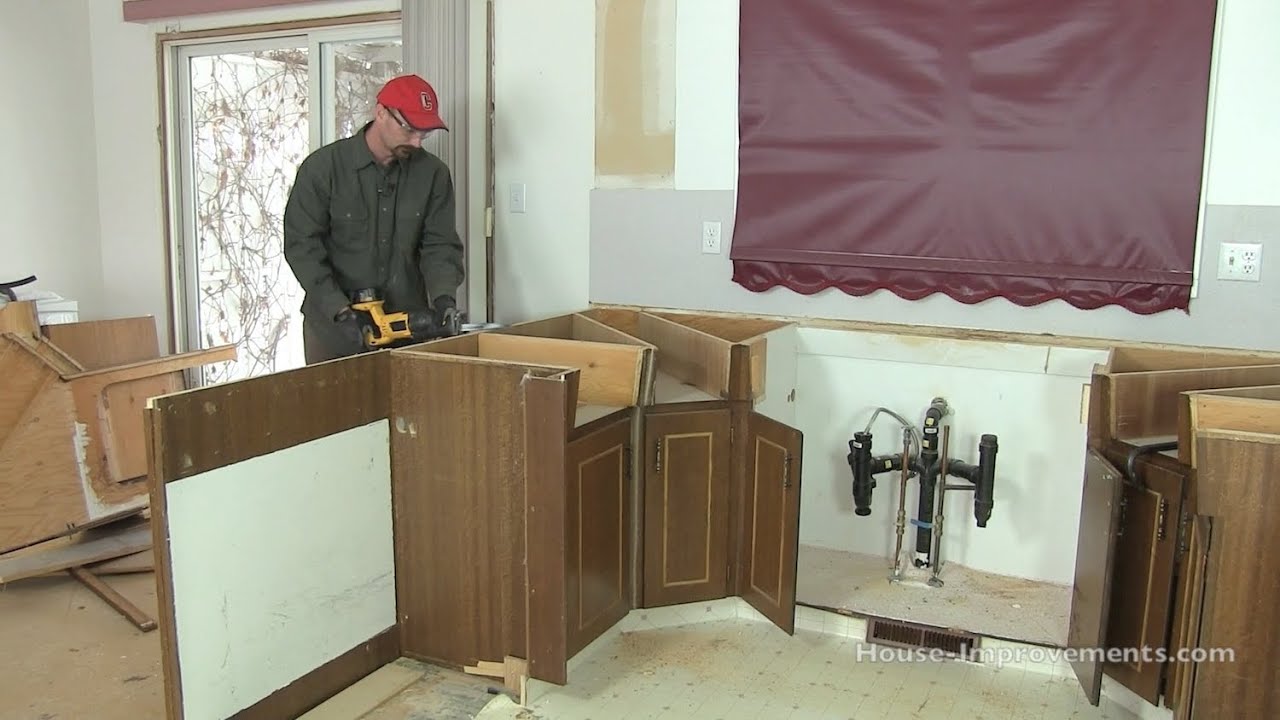
Removing Base Cabinets
Start by removing the countertop from the base cabinets. Use a screwdriver or drill to remove the screws or fasteners holding the countertop in place. Gently lift the countertop away and set it aside carefully.
Next, find and remove all fasteners that attach the base cabinets to the wall and to each other. These are usually screws located inside the cabinet or along the edges. Use a drill or screwdriver to take out all screws. Keep the screws in a safe place if you plan to reuse the cabinets.
Plumbing and appliances can block cabinet removal. Turn off the water supply before disconnecting plumbing under the sink. Use a wrench to detach pipes carefully. Move appliances like dishwashers or refrigerators away from the cabinets to create space for removal.
Dealing With Glued Cabinets
Signs of Glue Use include difficulty removing cabinets despite visible screws. Cabinets may feel firmly attached even after unscrewing. Look for glue residue or unusual gaps between cabinet edges and walls. Sometimes, glue is hidden behind trims or moldings.
Techniques for Separation start with gently prying the cabinets using a putty knife or flat pry bar. Work slowly to avoid cracking surfaces. Heat from a hairdryer can soften glue, making removal easier. Use a scraper to carefully break glue bonds. Repeat steps if cabinets remain stuck.
Preventing Damage involves supporting cabinets before removal to stop sudden drops. Cover floors and countertops with a protective sheet. Avoid forcing cabinets off walls quickly. Take your time to preserve wall drywall and cabinet finish. Use proper tools like clamps and wedges for safety.
Cleaning Up
Removing debris is essential after taking down kitchen cabinets. Clear all loose pieces and dust with a broom or vacuum. Proper cleanup helps avoid accidents and prepares the space for the next steps.
Wall damage often happens during cabinet removal. Small holes or dents can be fixed with spackle or wall filler. Sand the patched areas smooth once dry to create an even surface. This makes the wall ready for painting or new cabinet installation.
Preparing for new cabinets means checking the wall for any moisture or mold problems. Ensure the wall is clean and dry. Measure carefully to confirm the new cabinets will fit perfectly. Organize tools and materials before starting the installation.

Safety Tips
Heavy cabinets need careful handling to avoid injuries. Use two or more people to lift and move them safely. Keep your back straight and bend your knees when lifting. Avoid twisting your body while carrying cabinets to prevent strain.
Protect walls by placing a soft cloth or cardboard between the cabinet and wall. Remove screws slowly to avoid pulling paint or drywall off. Use a utility knife to cut any caulk or paint sealing the cabinet to the wall gently.
| Proper Tools | Purpose |
|---|---|
| Screwdriver or Drill | Remove screws holding cabinets to the wall |
| Utility Knife | Cut caulk or paint around cabinet edges |
| Pry Bar | Carefully separate cabinets from the wall without damage |
| Stud Finder | Locate wall studs for safe cabinet removal |
Frequently Asked Questions
Can I Remove Kitchen Cabinets Myself?
You can remove kitchen cabinets yourself if you have basic tools and strength. Support cabinets before unscrewing to avoid damage. Be cautious of glued areas, as removal may damage walls or cabinets. Always turn off utilities and work carefully for safety.
Are Kitchen Cabinets Glued To The Wall?
Kitchen cabinets usually attach to walls with screws or nails driven into studs. Sometimes, installers add glue for extra hold, especially in custom or unitized cabinets. Glue makes removal harder and can damage walls and cabinets. Standard installations rarely require glue, relying mostly on mechanical fasteners.
How Do You Remove Cabinets Without Damaging Walls?
To remove cabinets without damaging walls, first turn off power and water. Unscrew cabinet fasteners from wall studs carefully. Use a pry bar gently to loosen glued areas. Support cabinets to prevent sudden drops. Work slowly to avoid drywall damage.
Patch holes after removal.
How Much To Remove Old Kitchen Cabinets?
Removing old kitchen cabinets typically costs $100 to $300, depending on size and complexity. DIY removal saves labor costs but requires tools and effort. Professional removal ensures safety and prevents wall damage. Additional fees may apply for disposal or repairs after removal.
Conclusion
Removing kitchen cabinets takes patience and the right tools. Start by turning off power near the work area. Unscrew all visible screws holding the cabinets to the wall. Use a pry bar carefully to avoid wall damage. Support upper cabinets before removal to stay safe.
Take your time to prevent injuries and accidents. Clean the area after cabinet removal for a fresh start. Following these simple steps makes the job easier. Enjoy your updated kitchen space once cabinets are gone.

Yes, working as , Food Blogger and Product Reviewer for last 6 years. Here you will get amazing deals for Smart kitchen products. I am your best source for the latest update in cooking trends. I provide insightful articles, reviews, and analysis on cutting-edge kitchen gadget. My mission is to empower readers with the knowledge they need to stay ahead in a rapidly evolving coking world. Join me as we explore the future of food technology and how it shapes our lives today and tomorrow.